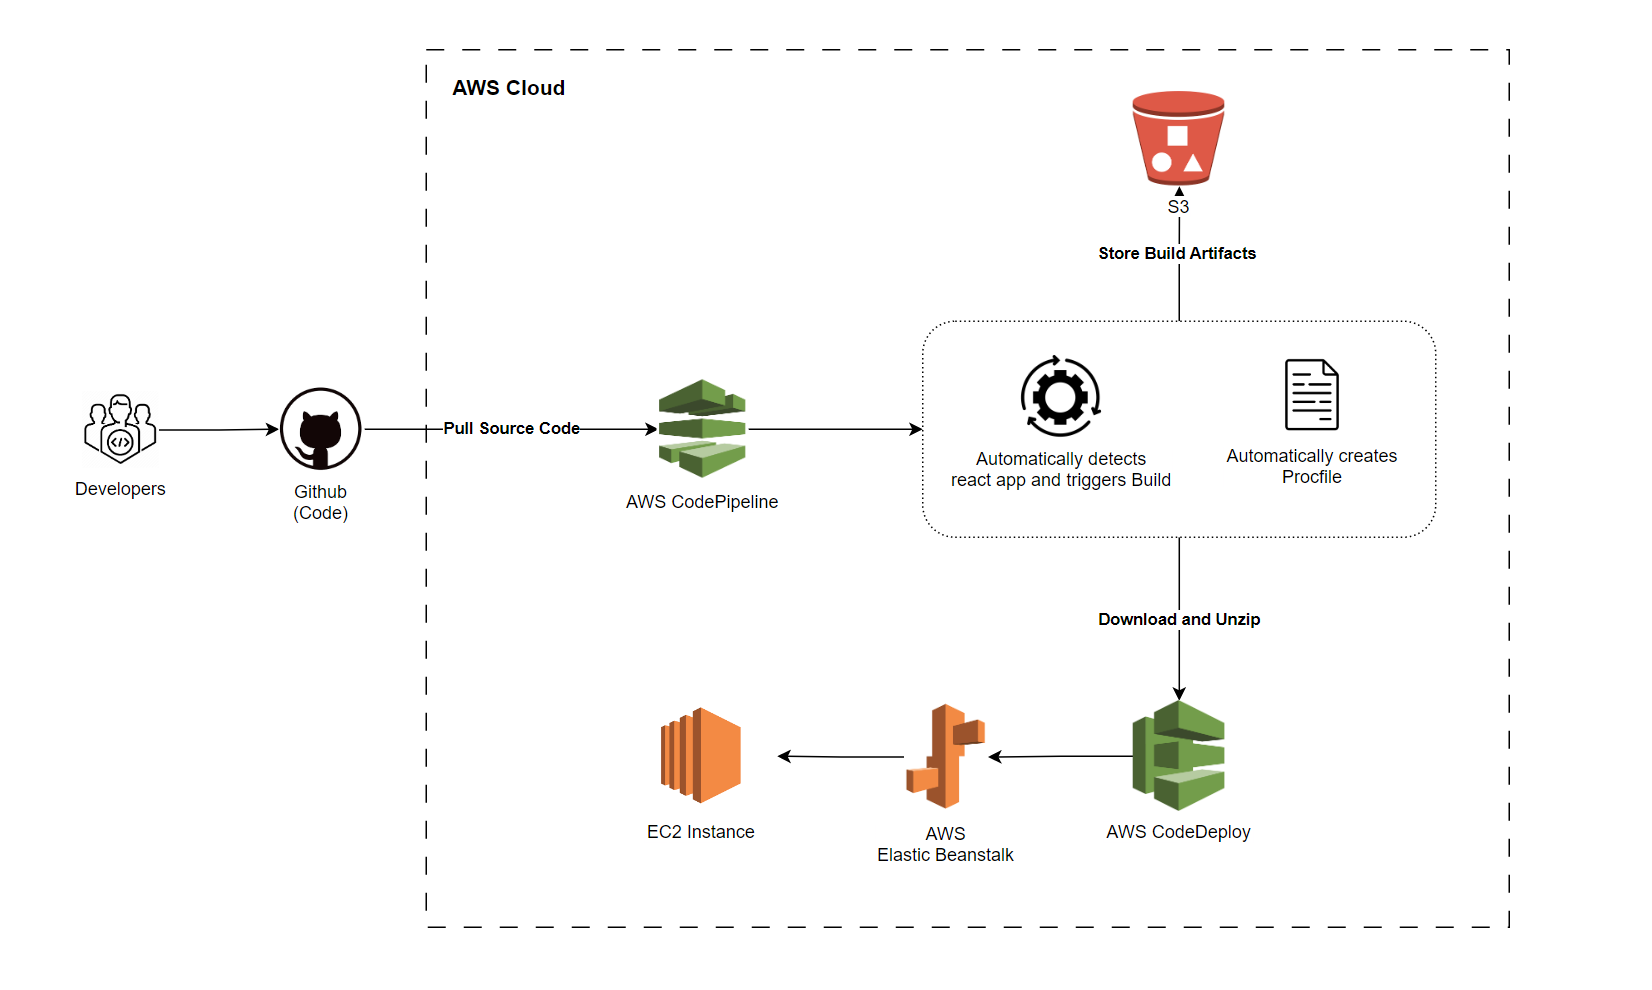
Overview
To set the expectations of the readers, first of all, this article is meant for developers/technical managers, who are beginners in AWS and want to automate React JS application’s deployment by using AWS CodePipeline.
This article is meant to provide instructions for setting up only development and test environments, pipelines. Please do not follow the steps mentioned in this article for setting up production environments/pipelines.
What is AWS Elastic Beanstalk?
Elastic Beanstalk is a fully managed service provided within AWS which facilitates management of deployment of the various types of applications. Following is a short description from AWS docs:
With Elastic Beanstalk, you can quickly deploy and manage applications in the AWS Cloud without having to learn about the infrastructure that runs those applications. Elastic Beanstalk reduces management complexity without restricting choice or control. You simply upload your application, and Elastic Beanstalk automatically handles the details of capacity provisioning, load balancing, scaling, and application health monitoring.
What is AWS CodePipeline?
AWS CodePipeline is a continuous delivery service you can use to model, visualize, and automate the steps required to release your software. You can quickly model and configure the different stages of a software release process. CodePipeline automates the steps required to release your software changes continuously.
Let’s get started with the practical
Prerequisites:
- AWS Account
- React JS Application
Steps:
- Create an application in Elastic beanstalk.
- Create an environment.
- Create pipeline via CodePipeline.
Create an application in Elastic Beanstalk:
- Login to AWS and navigate to Elastic Beanstalk.
- Click on “Create Applications” in Applications menu.
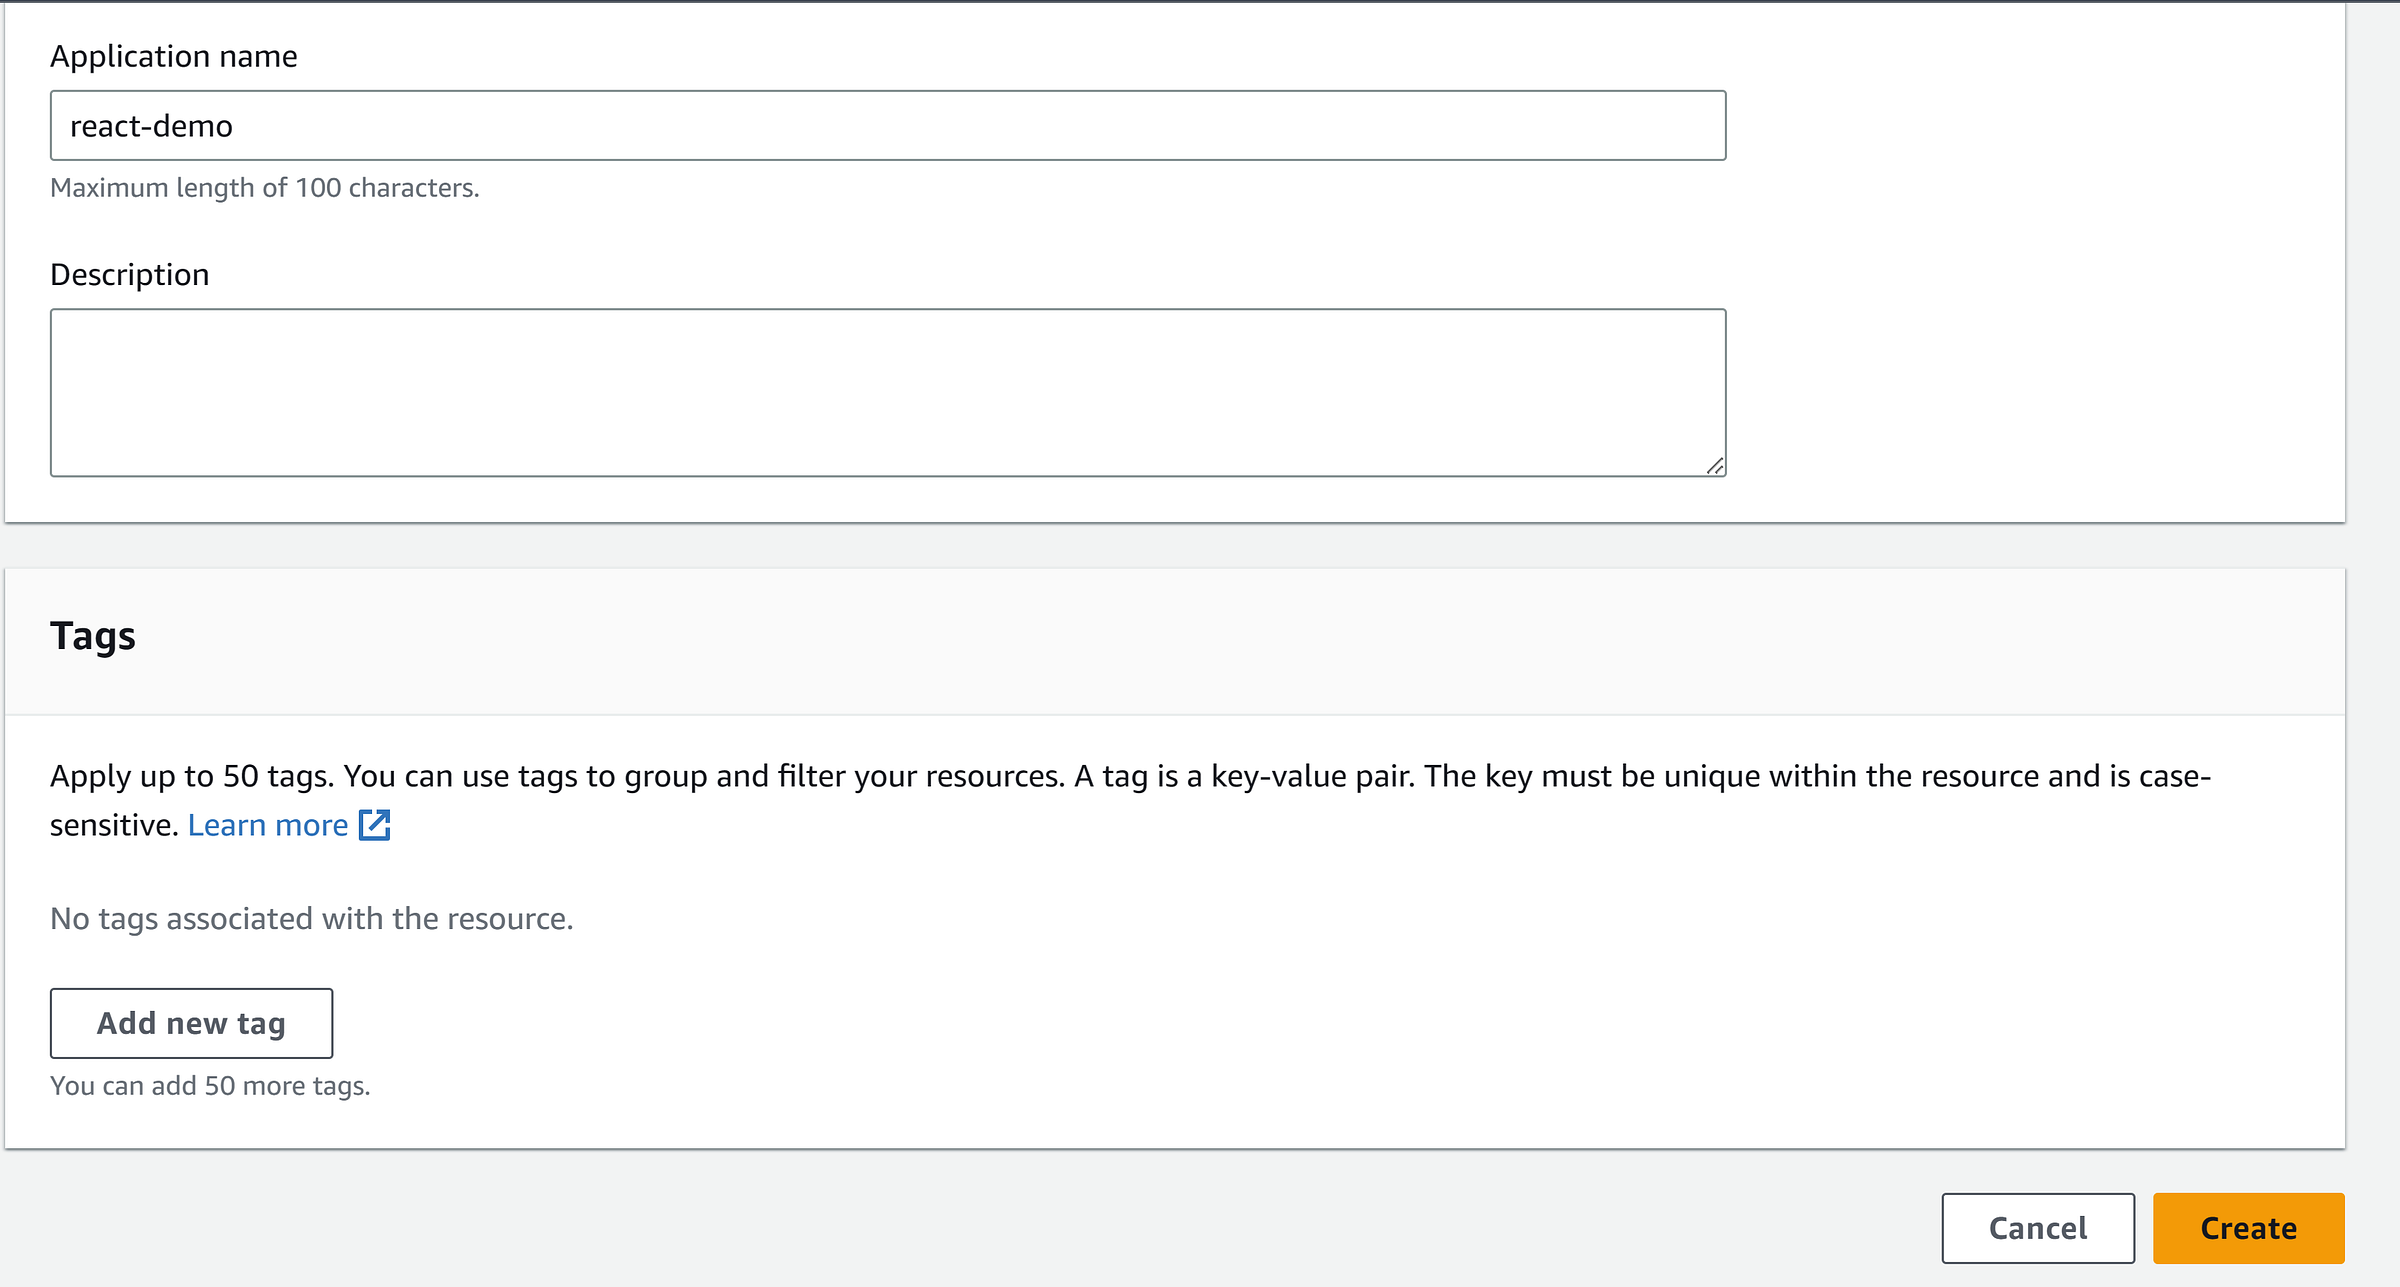
- Fill in the Application name. Rest of the details are optional. Click “Create” button.
Create an environment:
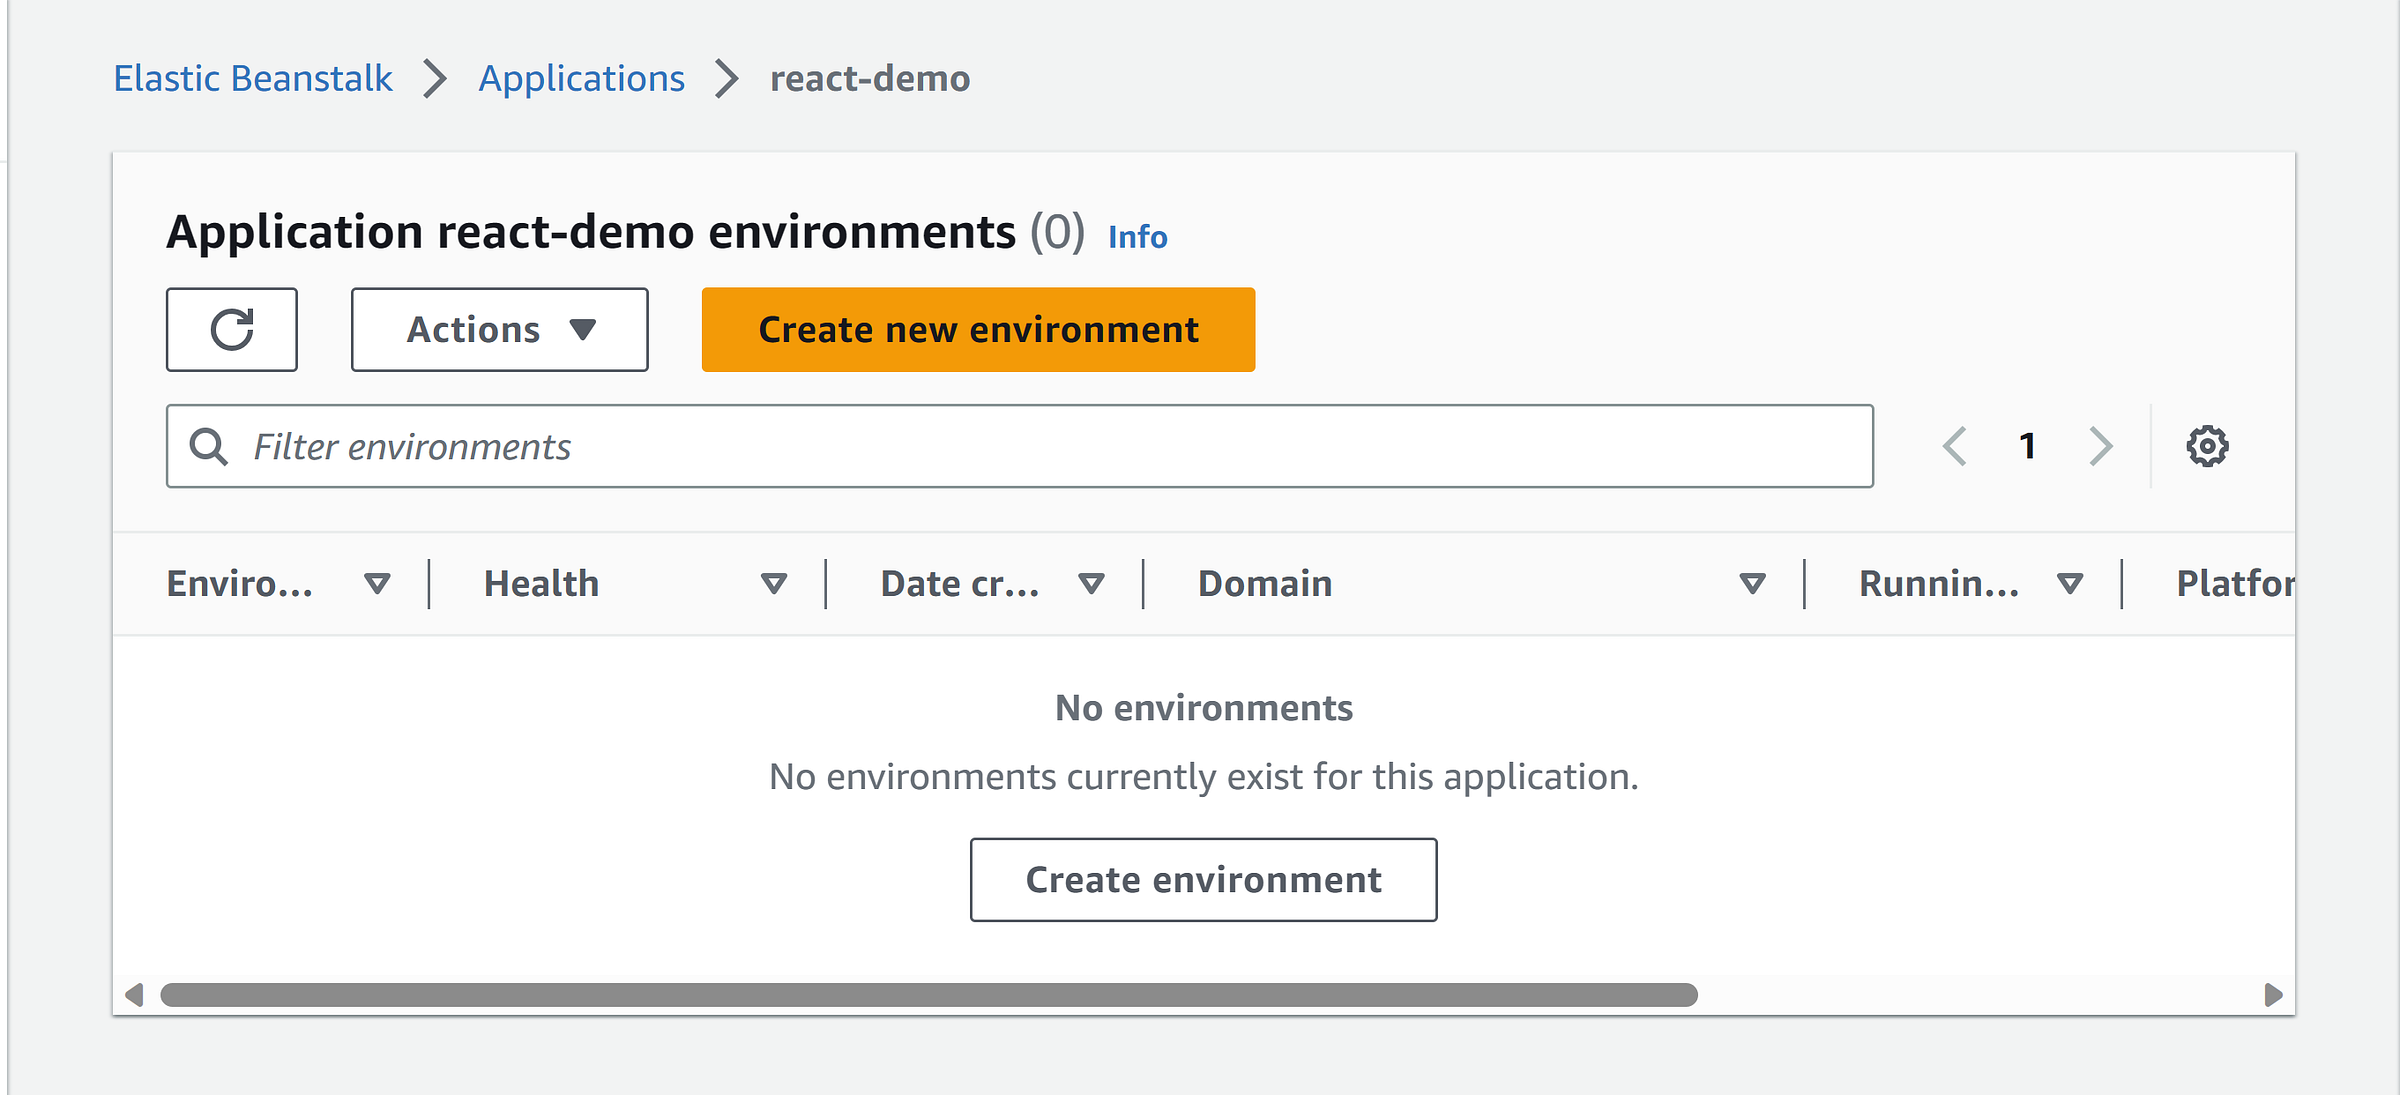
- On the next page, click on “Create Environment”.
- Select “Web server environment” in Environment Tier section.
- In “Environment information” section, mention environment name. This name should be relevant to your application.
- In Domain, enter the name, if you want to have a custom name, leave blank otherwise. An autogenerated domain name will be mapped to your environment.
Please note that at this stage, its not possible to map your own custom domain/sub-domain. This can be done later once the environment has been created. By default, every environment in EBS gets assigned an elastic IP Address. This IP address can be mapped to your A record in DNS settings for your domain.
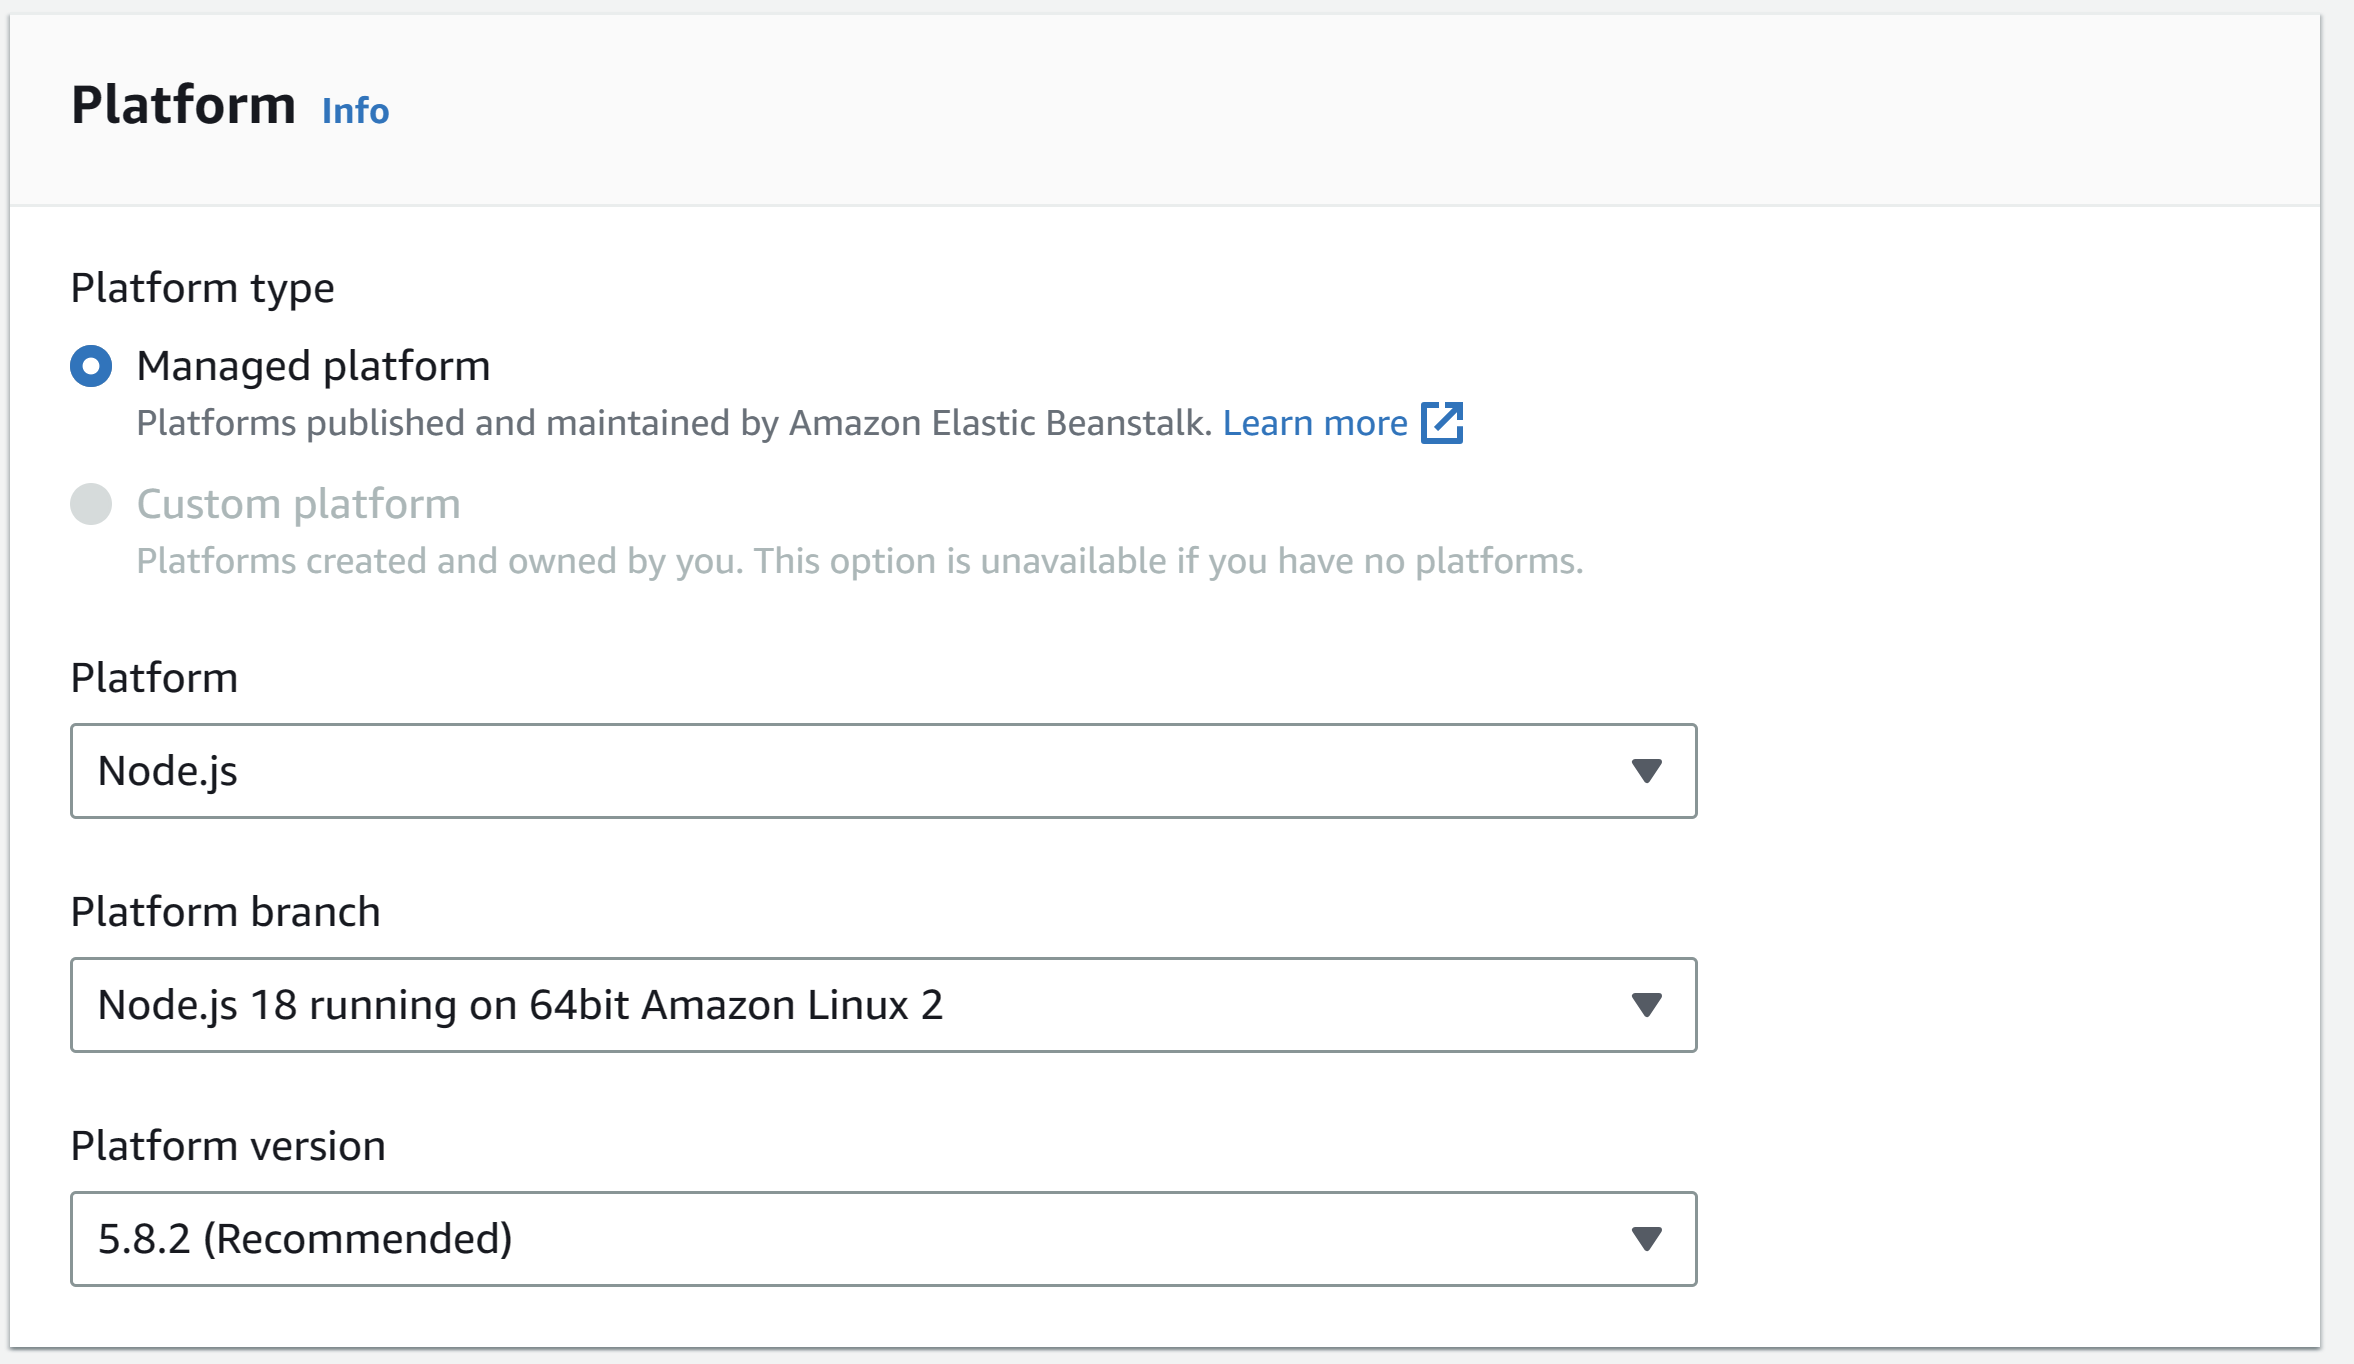
- Under “Platform” section, keep default option for Platform type which is “Managed platform”.
- Select Node.js in “Platform” drop down.
- You can keep the default values in the remaining two drop-downs in this section. It should look like this:
- In “Application code” section, select “Sample application”. Let EBS create and deploy a sample application. We will setup our react app by using CodePipeline later.
- Keep default option in “Presets” section unless you know what to select here.
- On next page, in “Service access”, click on “Create and use new service role”. Enter the name and corresponding service role will automatically be created. It will also assign required permissions to this role.
- In “EC2 key pair”, select if you already have a key pair, otherwise please follow the below mentioned link to create a new EC2 key pair. This key pair can be used later to connect to the underlying EC2 instance (Every environment in EBS will spin up a new EC2 instance by default).
- Please select “EC2 instance profile”, if you already have one otherwise follow these steps to create a new instance profile:
– Navigate to IAM>Roles page in AWS.
– Click “Create role”.
– Select “AWS Service” in “Trusted entity type” section.
– Select “EC2” in “Use case” section and click “Next”
– Assign following “Permissions policies”:
AWSElasticBeanstalkWebTier
AWSElasticBeanstalkWorkerTier
AWSElasticBeanstalkMulticontainerDocker
AWSElasticBeanstalkEnhancedHealth
AWSElasticBeanstalkRoleWorkerTier
AWSElasticBeanstalkManagedUpdatesCustomerRolePolicy
– Specify Role name and click on “Create role”
- Now click on refresh button to refresh the drop-down option and choose the newly created instance profile role.
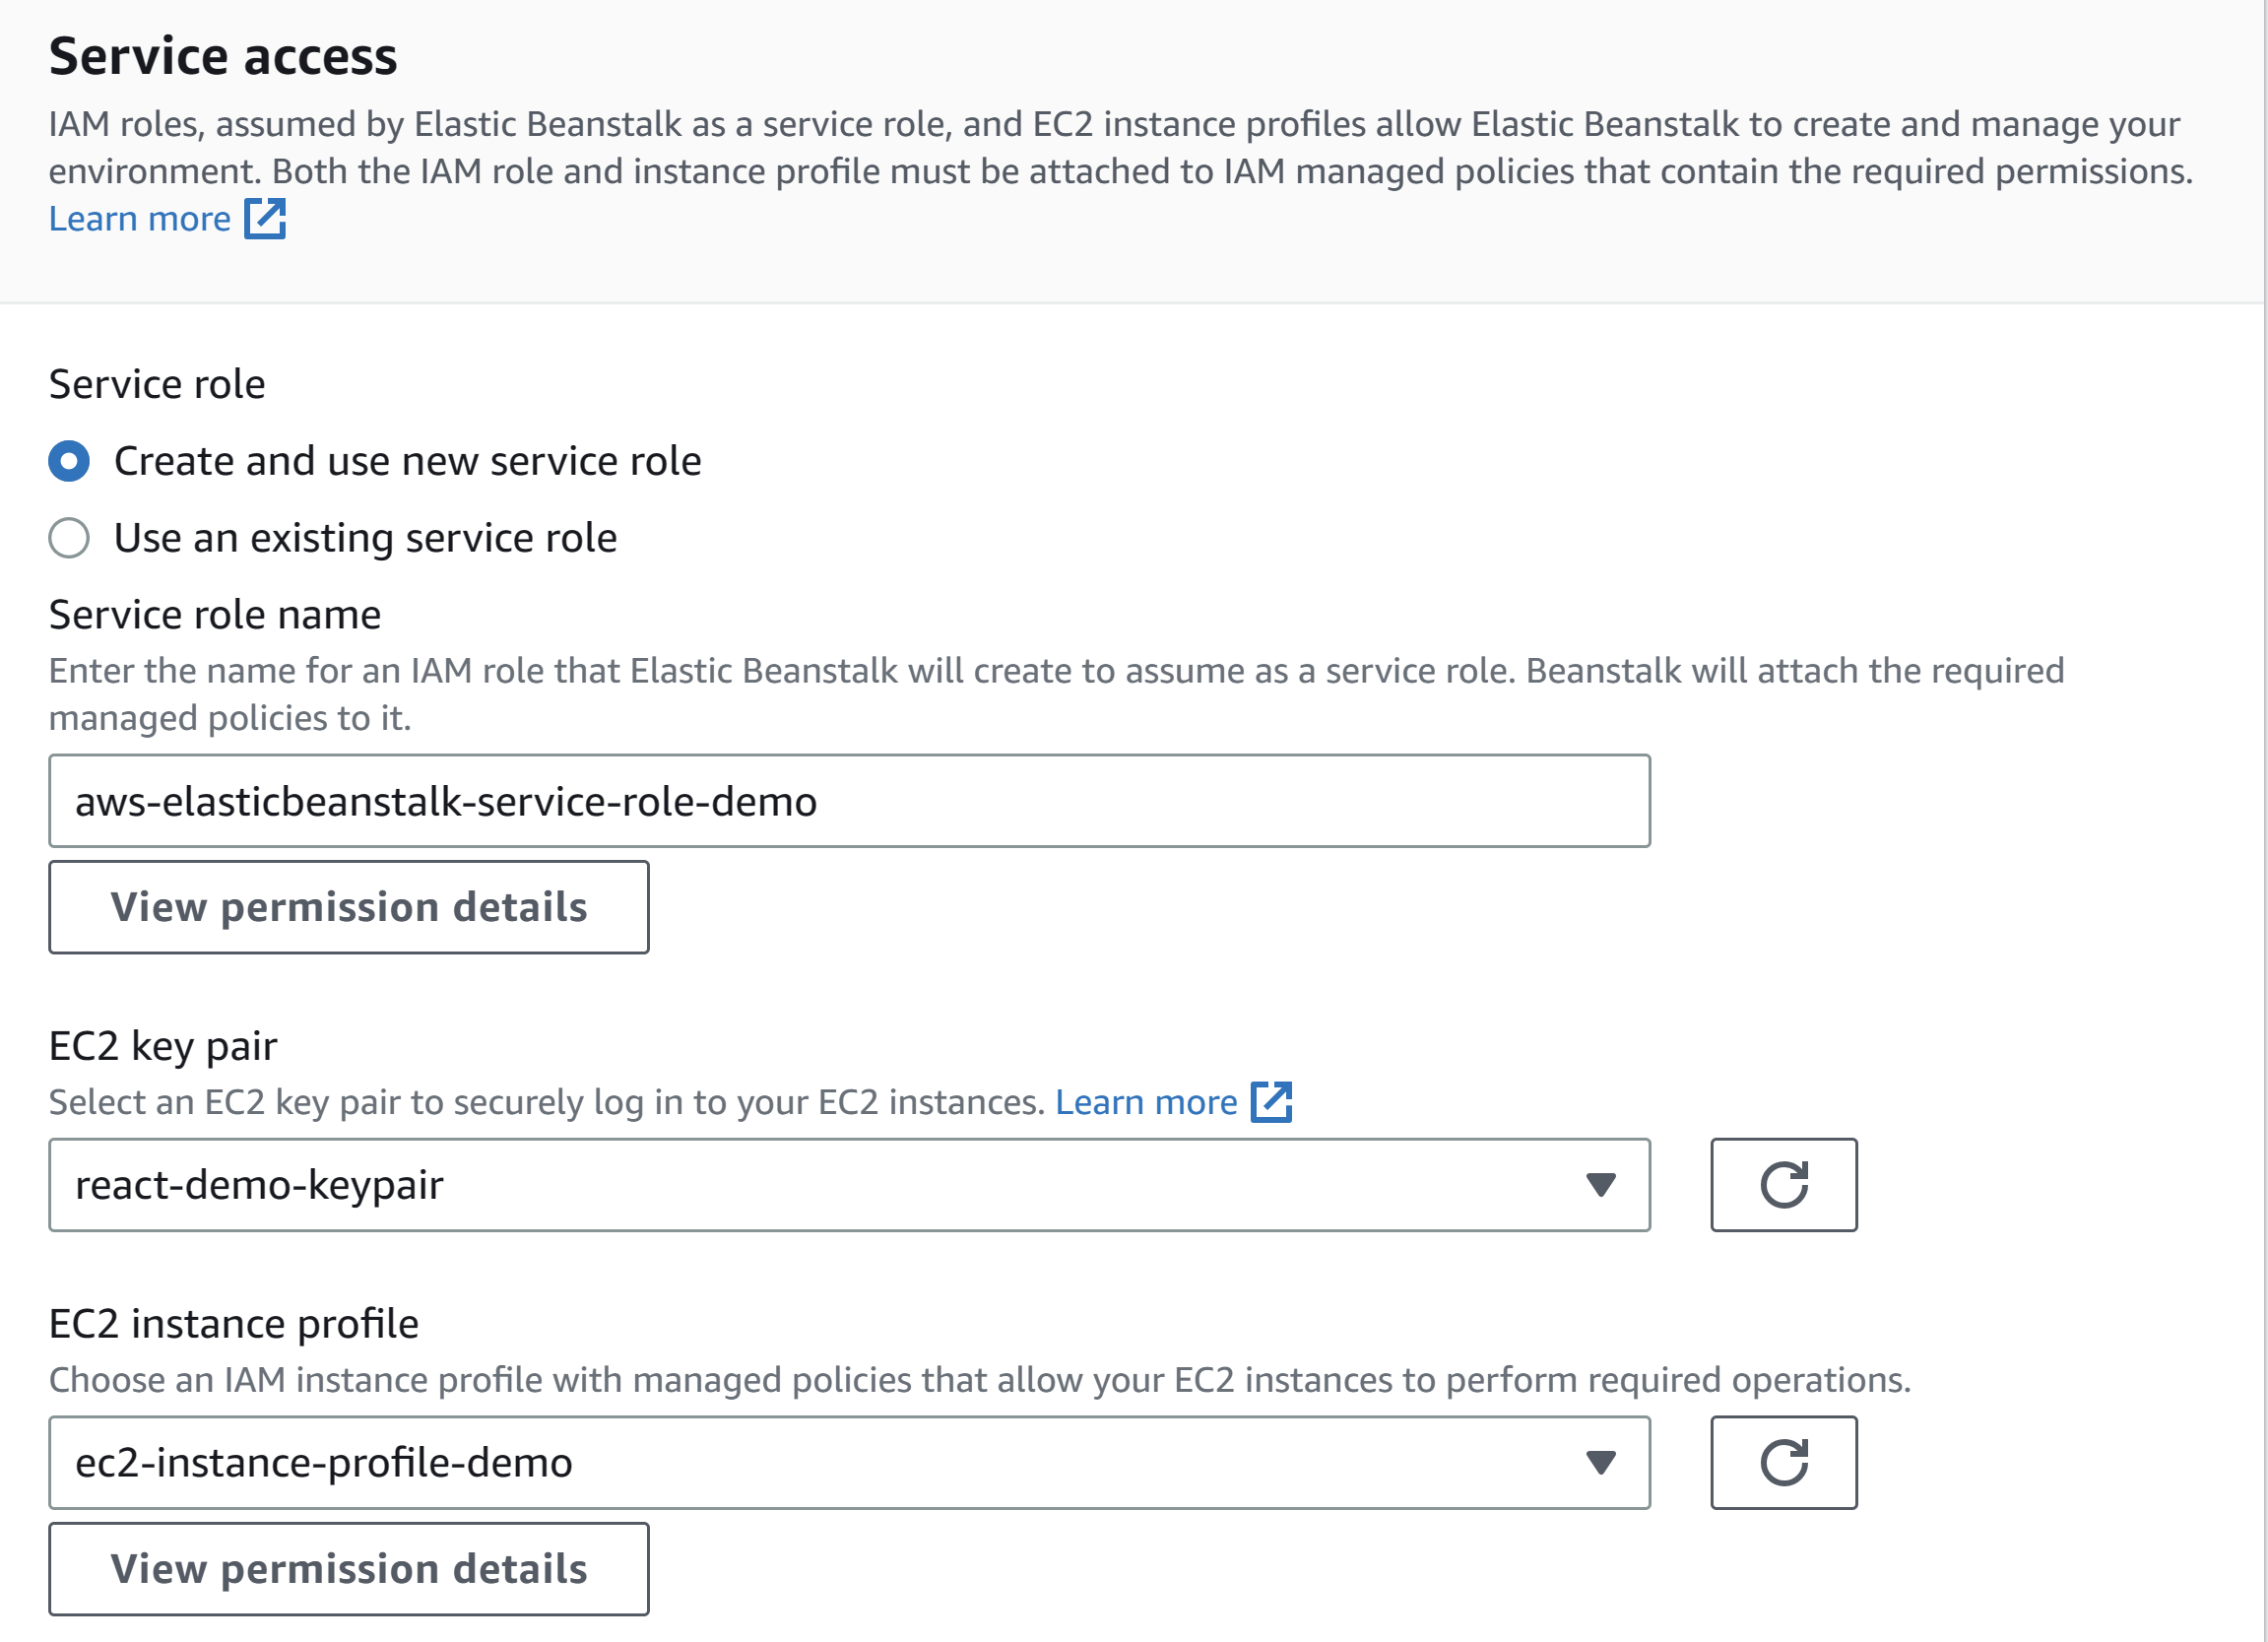
- Leave the default options selected on the next few pages (Unless you know what to select) until “Review” page is displayed. Click “Submit” button and wait unless the new environment is created.
Create pipeline via CodePipeline:
- Once the environment is created, navigate to “CodePipeline” and click “Create pipeline”.
- Enter the name and select “New service role”. Click Next.
- Select “Source Provider”. This is your source code provider. I am using GitHub so I selected GitHub (Version 2). Here you can create connection to your source provider, choose repository to let CodePipeline pull source code from, choose branch name.
- Leave remaining sections to default values and go to next page.
- Here we can skip “Build provider”. CodePipeline will automatically detect the react app and create a Procfile.
Please note the build provider should only be skipped if you are setting up a Dev/Test pipeline. For production versions, you should choose the build provider and set it up accordingly. Production pipeline is out of scope for this article.
- On the next page, select “AWS Elastic Beanstalk” as a deploy provider. Select newly created Application and its environment in the dropdowns:
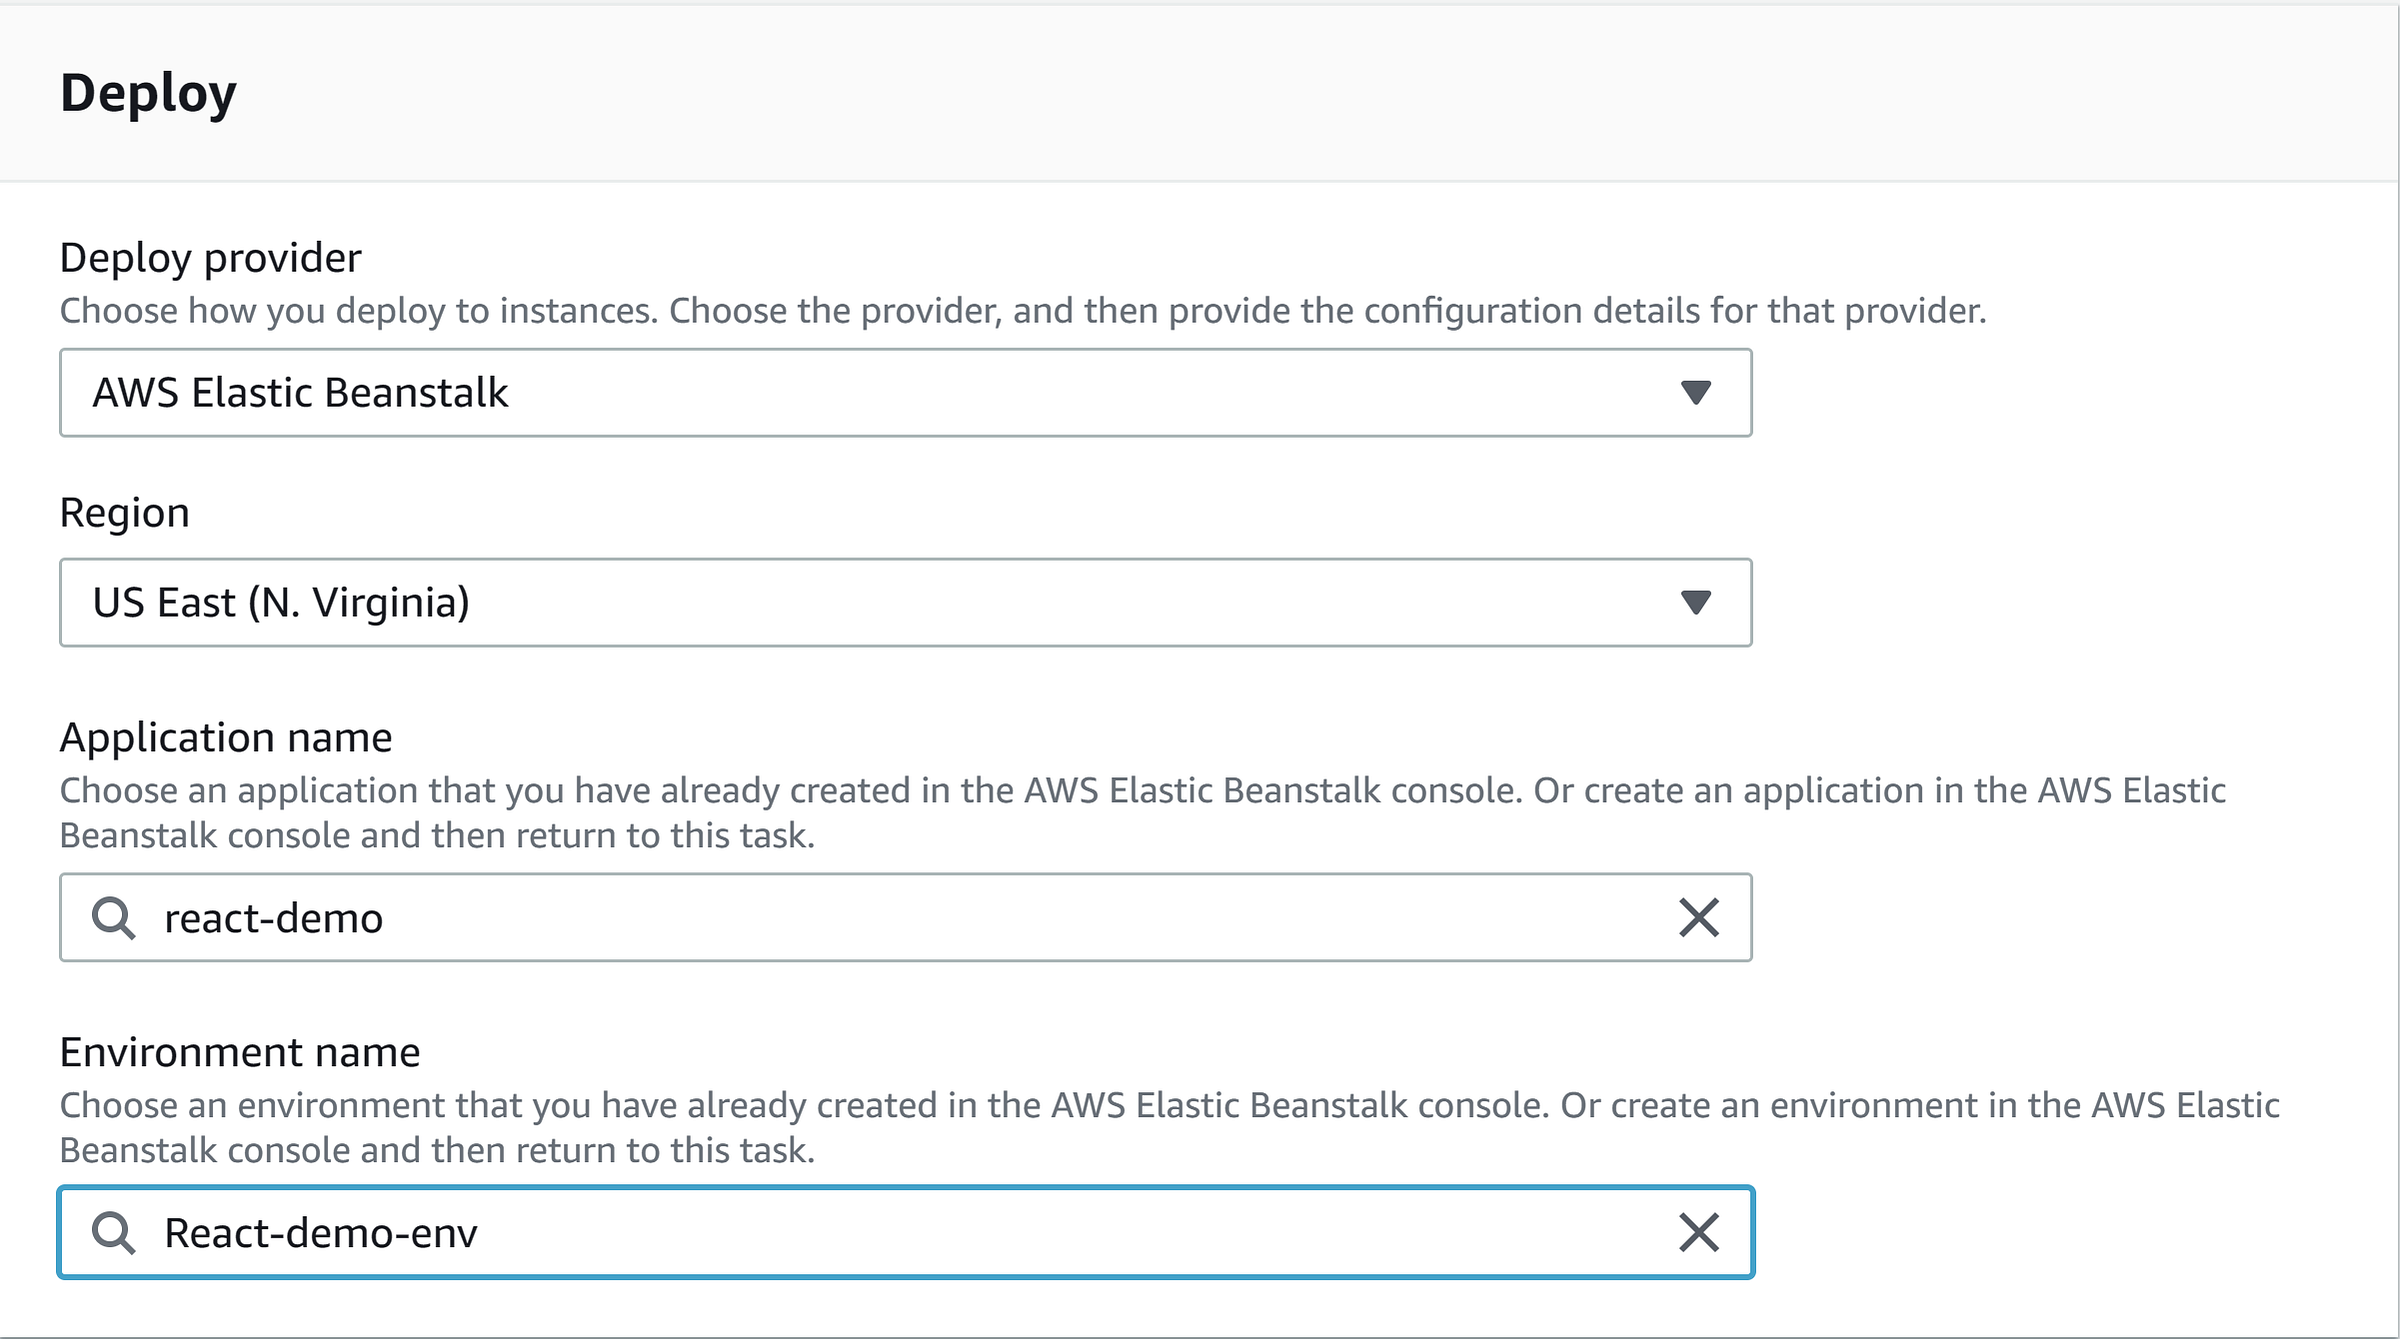
- Go to next page and click on “Create pipeline”. Wait until the pipeline is created. It will start the pipeline automatically first time. Source code will be pulled from the selected repository/branch and deployment will be triggered. Once deployment is successful, your page should look like this:
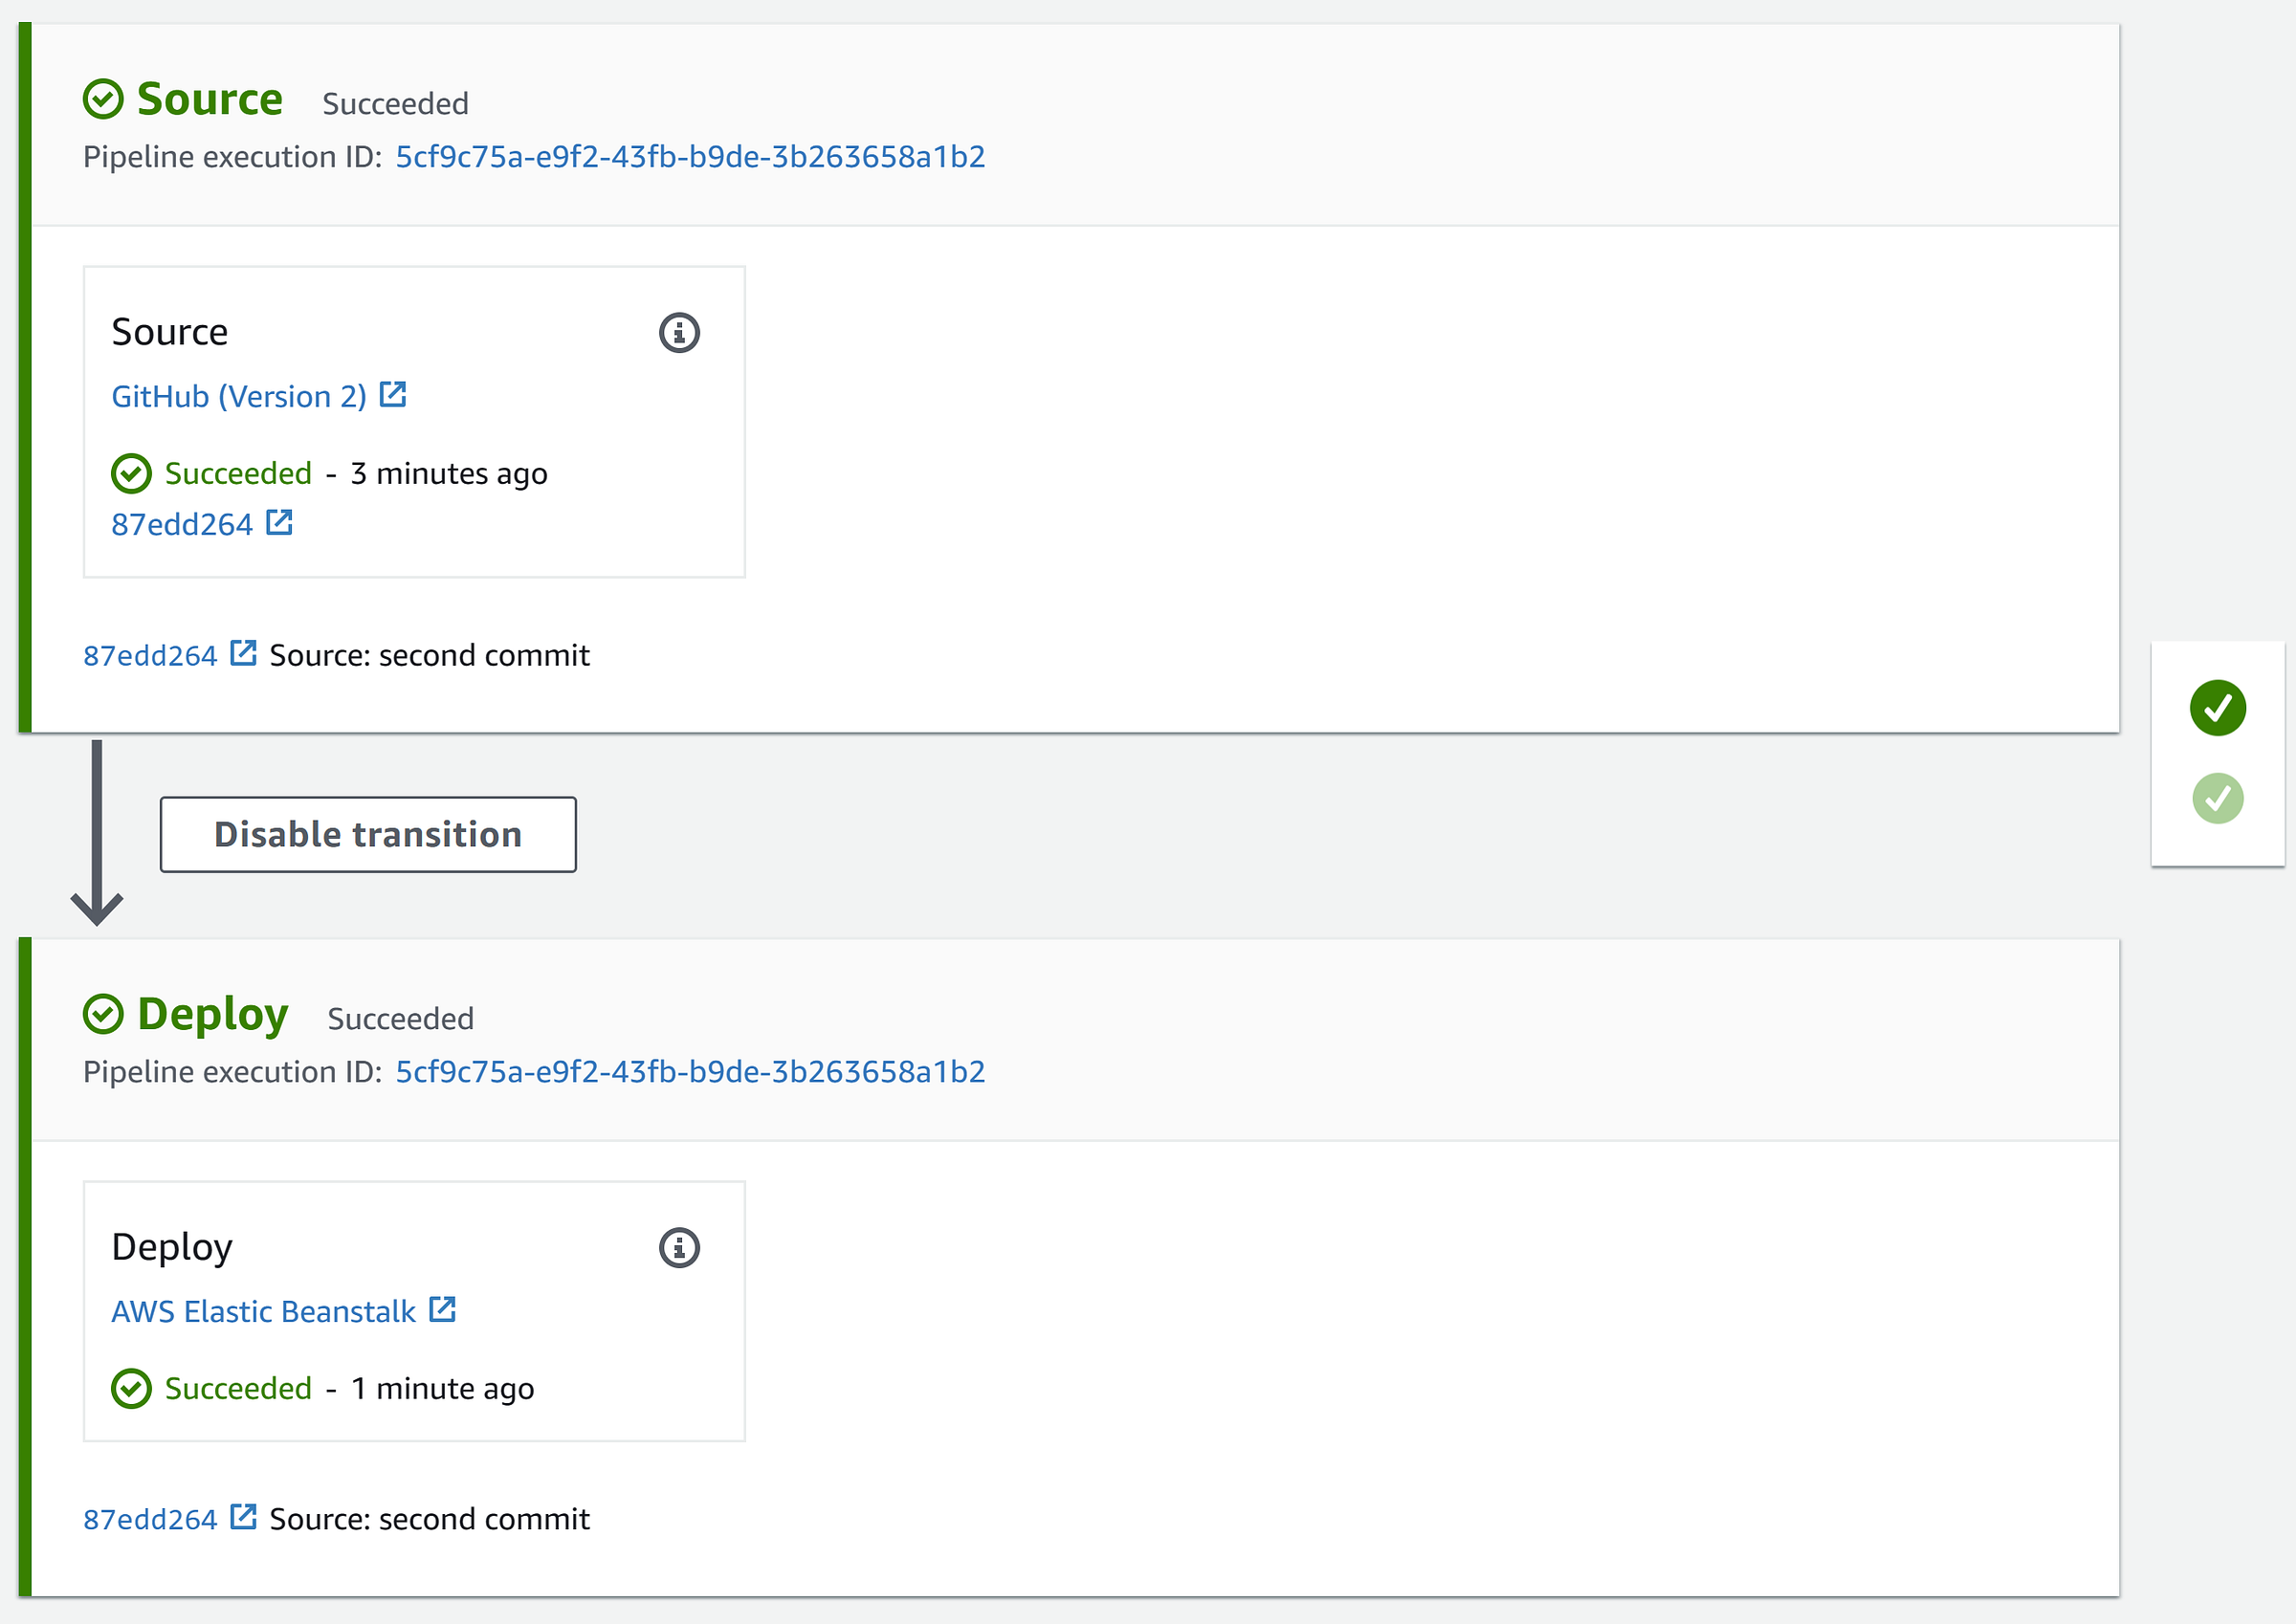
- Congratulations! React app has been successfully deployed now. You can navigate to your environment and see the app running:
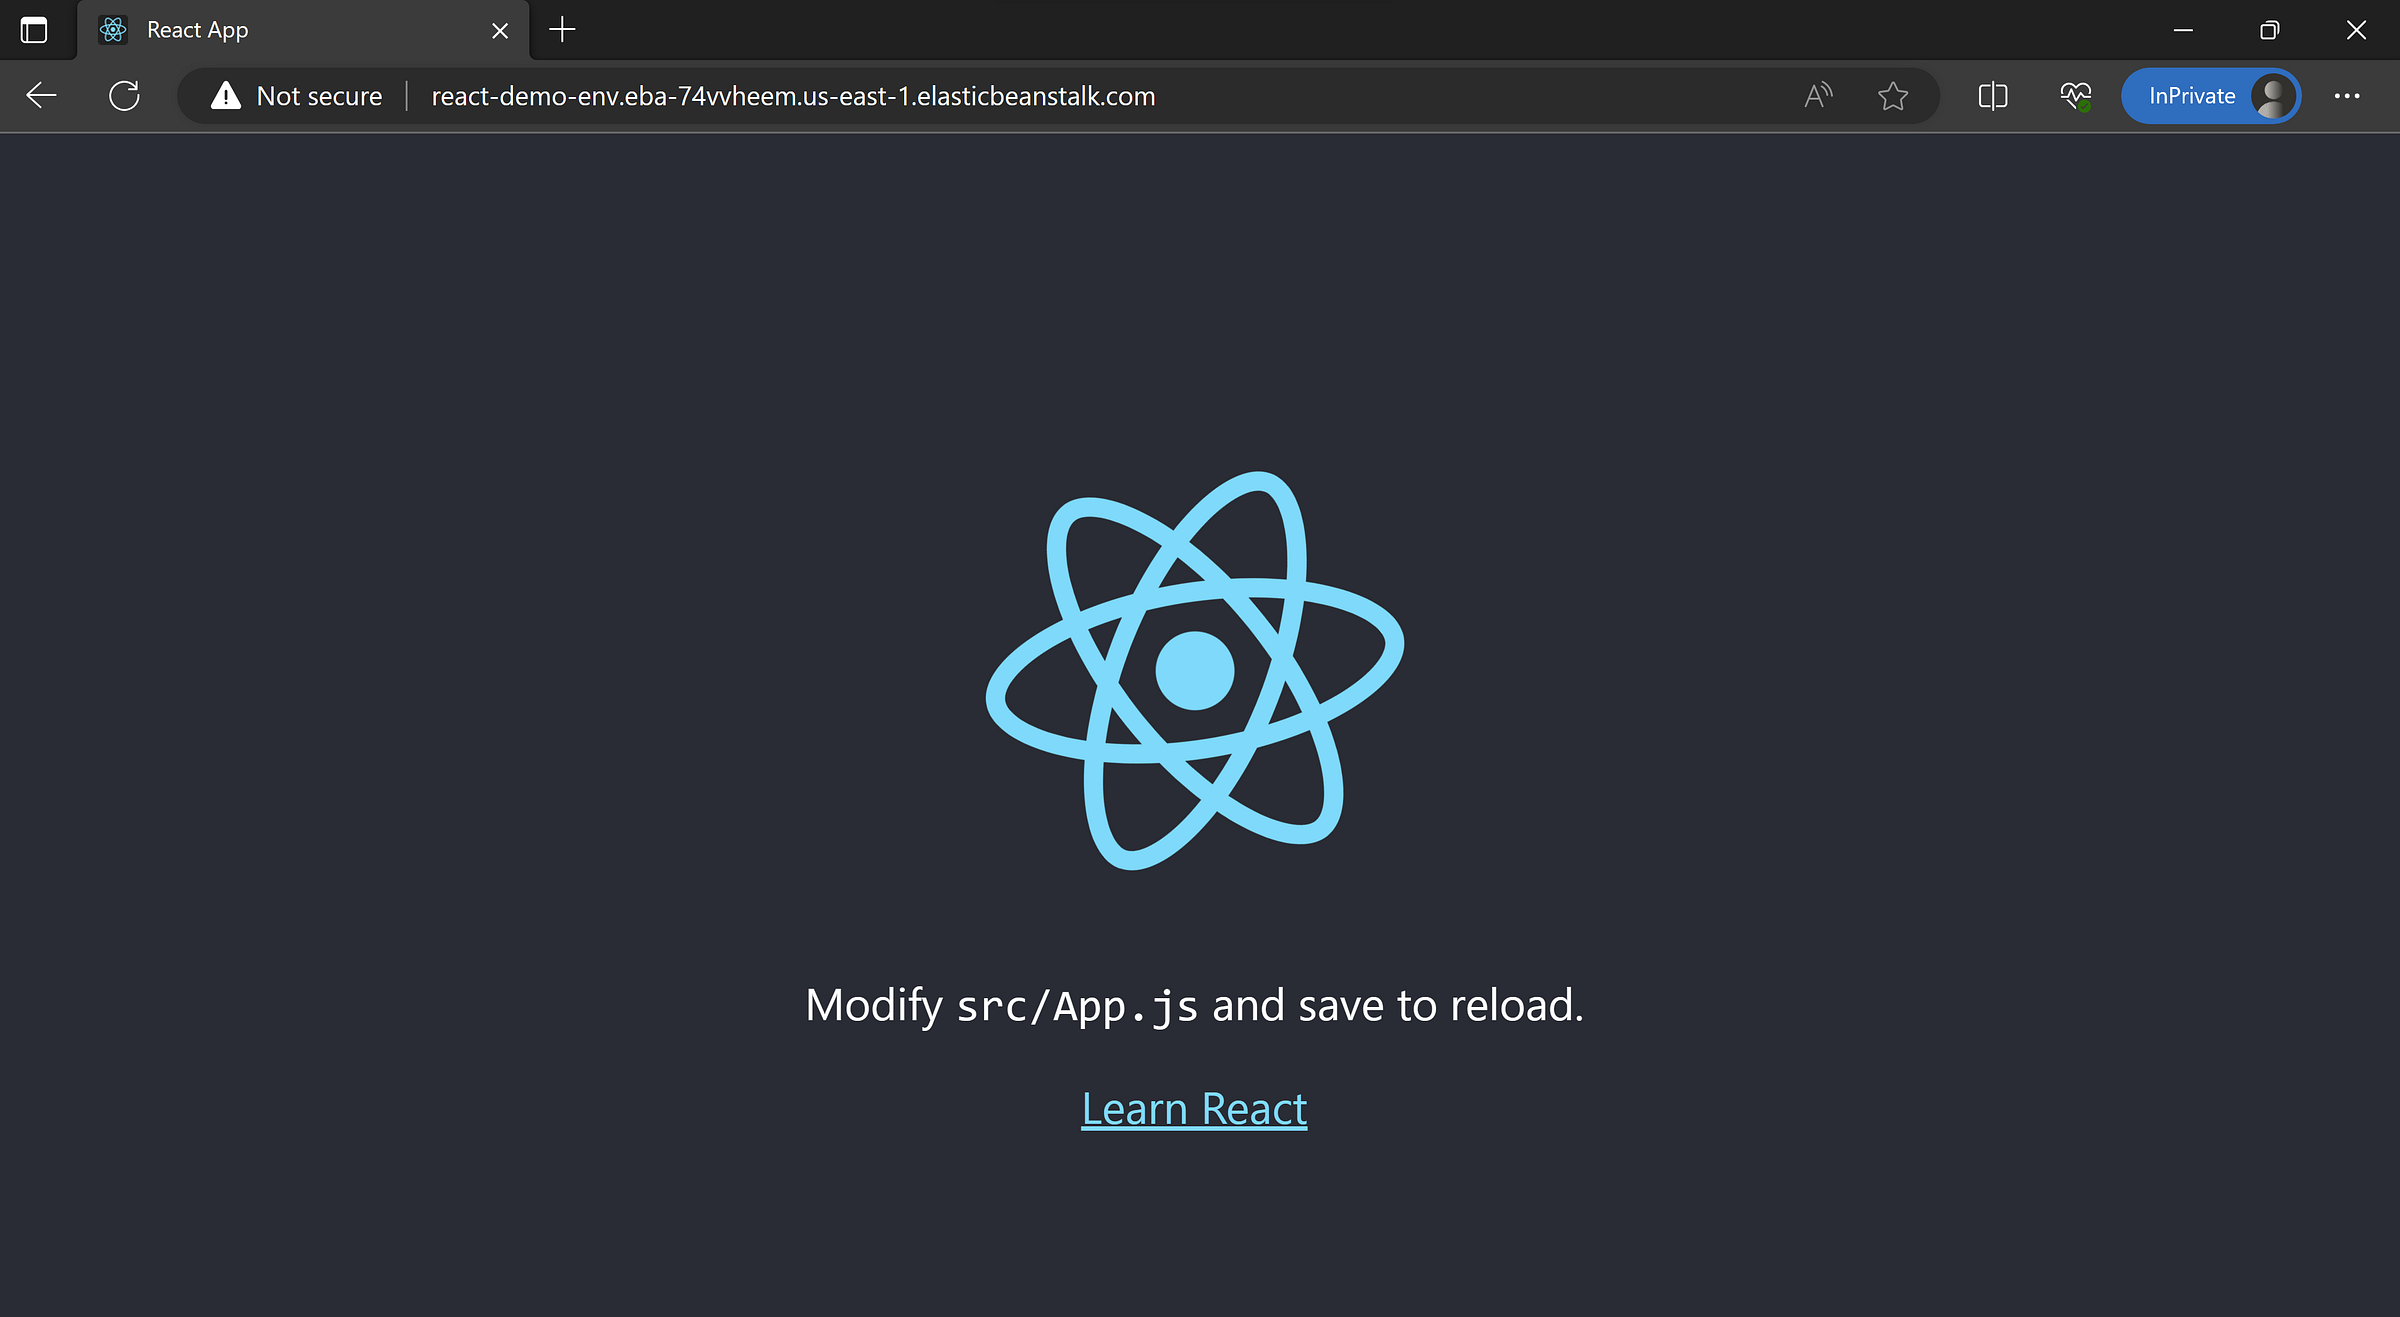
Now, every time there is a new commit in the selected branch, CodePipeline will trigger a new build and deployment. You can also setup notifications for CodePipeline events and stages.
Debugging
If for some reason, your app does not run. You can always connect to the EC2 instance created by Elastic Beanstalk. You can use the Keypair generated while creating the environment in EBS. Once connected to EC2 instance, go to /var/app/current to see the deployed files for your app.
EBS does maintain basic logs and health checks for the environments. So, if you want to check logs, you can navigate to the environment and download all the logs for debugging.
Thank You!!