XM Cloud comes preloaded with basic components for text, images, page content, and more. In my previous blogs, I covered how to create and manage components in XM Cloud using the Component Builder. In this post, I’ll provide a step-by-step guide to building custom components in Next.js within the XM Cloud environment.
Why Custom Components Matter
Developing custom components is a standard approach to creating unique elements that enhance your pages’ design, functionality, and user experience.
Step 1: Creating a New Headless Module
To create a custom component in Sitecore XM Cloud, you first need to set up a Headless Module. Here’s how:
- Navigate to Settings -> Project -> [Site Name] in XM Cloud.
- Right-click your project, select Insert, and then click Headless Module.
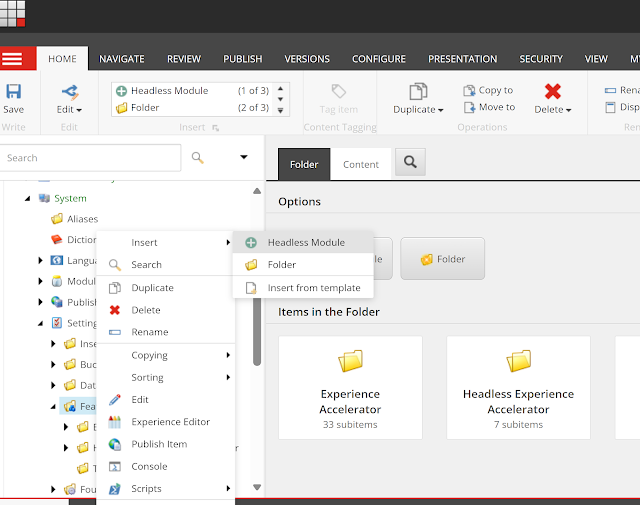
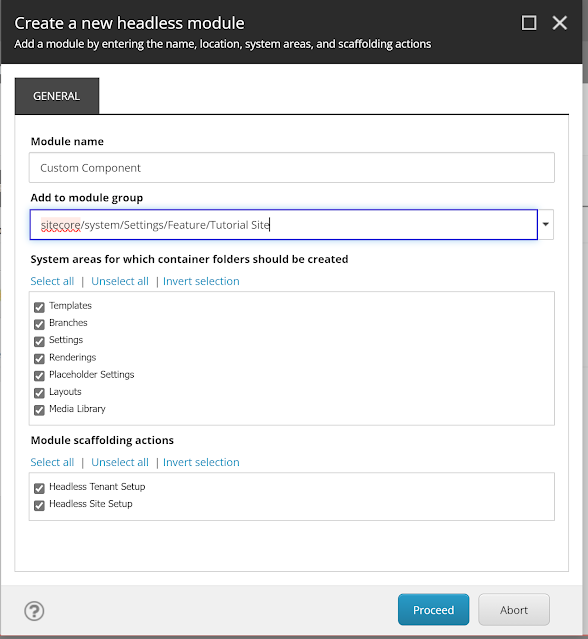
- In the popup window, choose a name for the module (e.g., Custom Component) and assign it to a folder. For this tutorial, we created a “Tutorial Site” folder under Feature to store our custom modules like Basic Content.
Step 2: Cloning a Rendering
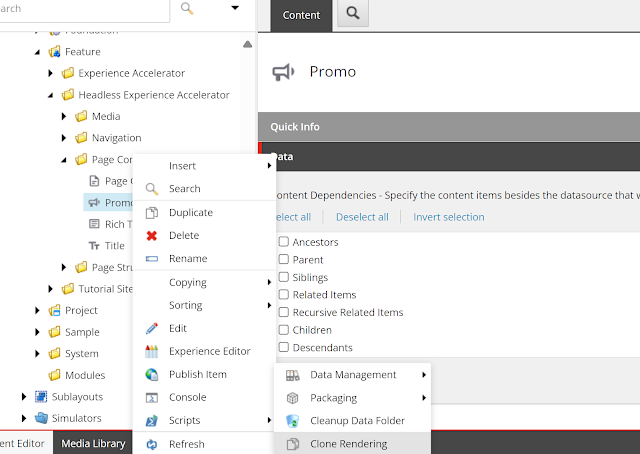
After creating the module, clone an existing out-of-the-box (OOTB) Headless rendering to save time. For this example, we’ll clone the Promo component.
- Right-click the rendering, navigate to Scripts, and select Clone Rendering.
- In the popup, provide a name for the new rendering (e.g., Article) and link it to the module created earlier.
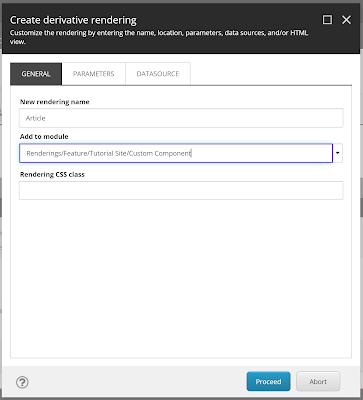
- Ensure the Parameters and Data Source tabs have Copy Original Rendering Parameters selected.
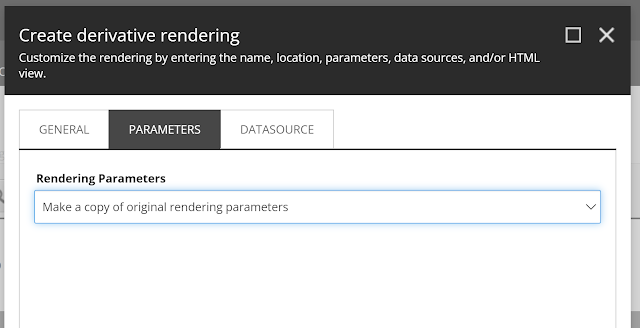
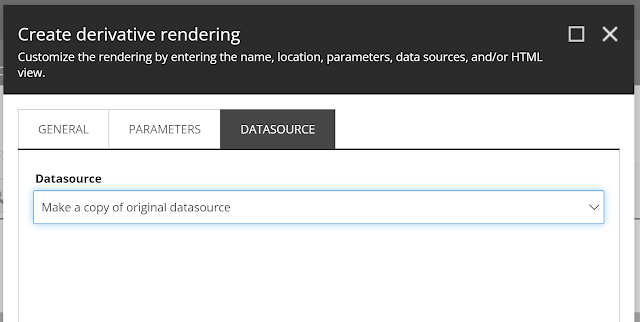
Next, locate the template under Templates/Feature/Tutorial Site/Custom Component. Update the Article template to include fields specific to your new component.
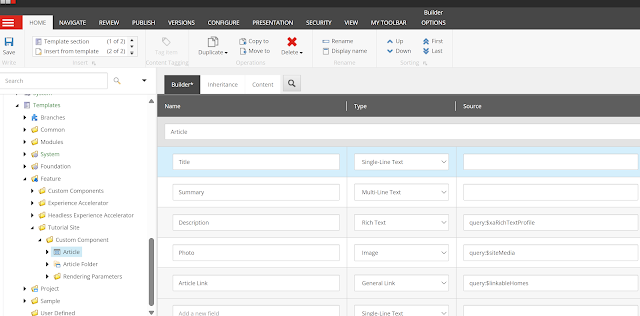
Step 3: Importing the Component Module to the Site
Once the template is ready, the module can be added to your site:
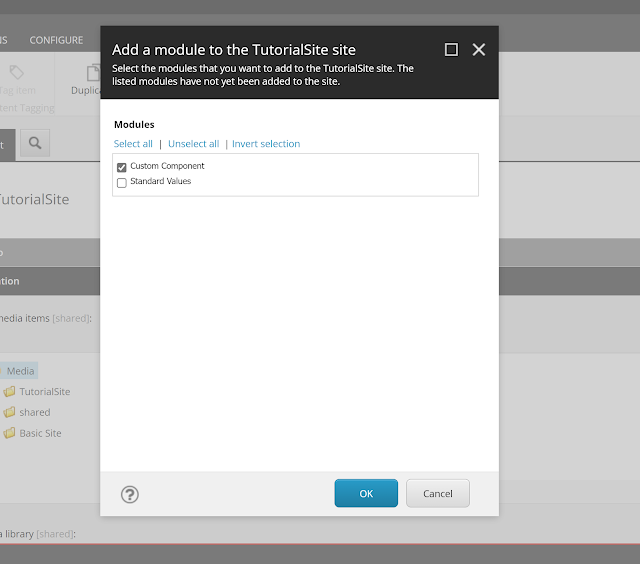
- Use the Scripts -> Add Site Module command.
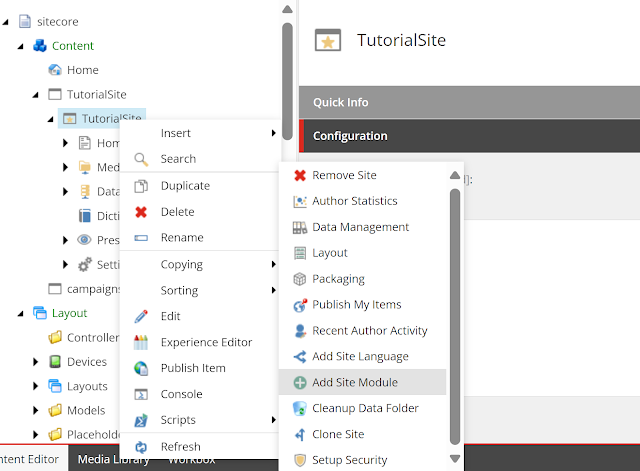
- In the popup, select your new module for installation.
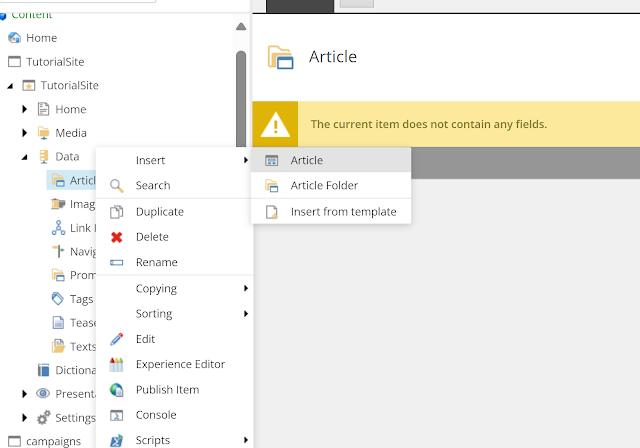
- A corresponding Data folder will be created for storing content items.
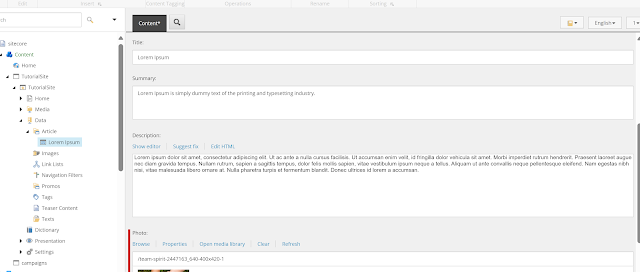
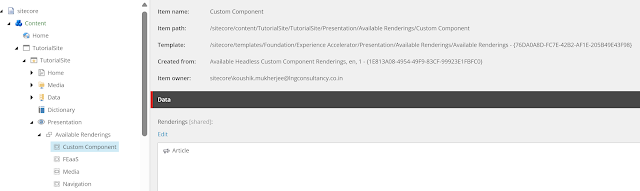
Add the component to Presentation -> Available Renderings to make it accessible for drag-and-drop functionality on pages.
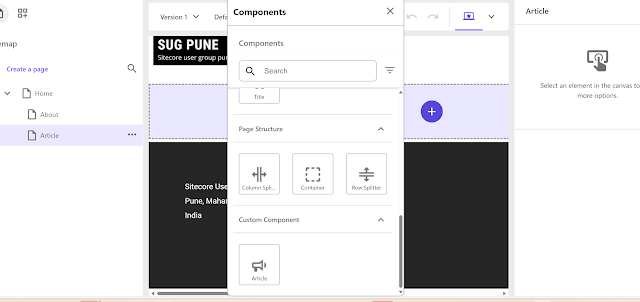
Finally, open the page editor, locate your component, and place it on the desired page. Ensure all related items are published in XM Cloud to avoid visibility issues.
Step 4: Creating SXA Components in Code
TypeScript View File
The TypeScript file for your component must match the Component Name field on the rendering item in XM Cloud. Use the withDatasourceCheck higher-order component to fetch and render data from the Sitecore Content API. Key libraries include @sitecore-jss/sitecore-jss-nextjs for managing field types like Field, ImageField, Text, and Link.
- Create the view file in the src/components/rendering folder.
- Scaffold the component using the JSS command:
jss scaffold “Article”- Alternatively, create the component manually. Ensure the fields are editable in Experience Editor and render correctly in preview mode.
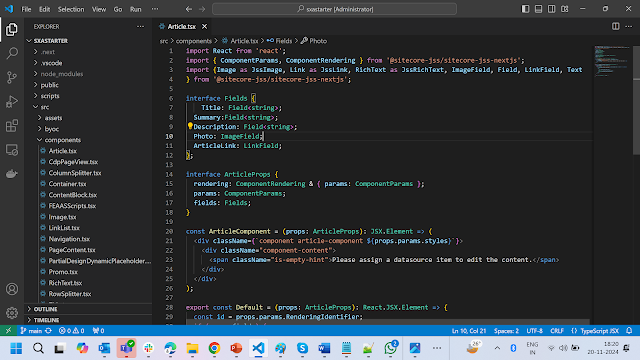 import React from ‘react’;import { ComponentParams, ComponentRendering } from ‘@sitecore-jss/sitecore-jss-nextjs’;import {Image as JssImage, Link as JssLink, RichText as JssRichText, ImageField, Field, LinkField, Text} from ‘@sitecore-jss/sitecore-jss-nextjs’;interface Fields {Title: Field<string>;Summary:Field<string>;Description: Field<string>;Photo: ImageField;ArticleLink: LinkField;};interface ArticleProps {rendering: ComponentRendering & { params: ComponentParams };params: ComponentParams;fields: Fields;}const ArticleComponent = (props: ArticleProps): JSX.Element => (<div className={`component article-component ${props.params.styles}`}><div className=”component-content”><span className=”is-empty-hint”>Please assign a datasource item to edit the content.</span></div></div>);export const Default = (props: ArticleProps): React.JSX.Element => {const id = props.params.RenderingIdentifier;if (props.fields) {return (<div className={`component my-component ${props.params.styles}`} id={id ? id : undefined}><JssImage field={props.fields.Photo} /><div><h2><Text field={props.fields.Title} /></h2><JssRichText field={props.fields.Description} /><JssLink field={props.fields.ArticleLink} /></div></div>);}return <ArticleComponent {…props} />;};
Step 5: Testing and Launching the Component
Fetch data via the Layout Service or GraphQL API, using the ComponentRendering object from the JSS SDK to map XM Cloud fields to the component structure.
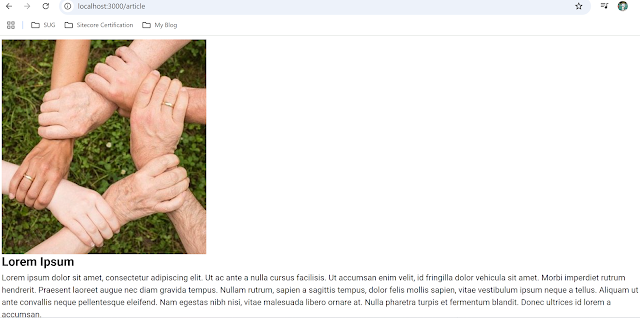
Run the following command to test your component in connected mode:
This launches the app locally at http://localhost:3000, allowing you to preview and refine your component.
Conclusion
Building custom components in Sitecore XM Cloud with Next.js is a streamlined process. By following these steps—creating modules, cloning renderings, scaffolding, and testing—you can develop engaging, dynamic components tailored to your project. Dive in and elevate your XM Cloud applications with polished, user-focused designs!