In this blog, I’ll explain how you can set up Single Sign-On (SSO) in Sitecore AI (XM Cloud). SSO simplifies login management, allowing teams to access the Sitecore Cloud Portal and its applications using their existing identity providers. Sitecore Cloud Portal supports identity providers that use either OpenID Connect (OIDC) or Security Assertion Markup Language (SAML) protocol.
We had a requirement to implement SSO using Microsoft Entra ID. Here I’ll explain the step-by-step process to implement that.
Prerequisites
Before starting the configuration, please ensure you have the following access:
- Azure AD Permissions: The ability to register Sitecore Cloud Portal as an application in Azure AD.
- Sitecore Cloud Portal Administrative Access: You must hold an Organization Admin or Organization Owner role in Sitecore Cloud Portal.
- Domain Configuration Access: Permission to create a TXT record with your domain host provider.
Set Up Azure Entra ID
- Log in to the Azure Portal.
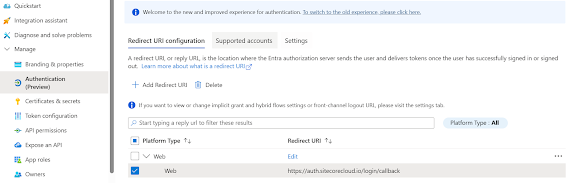
- Go to Microsoft Entra ID → Manage → App registrations.
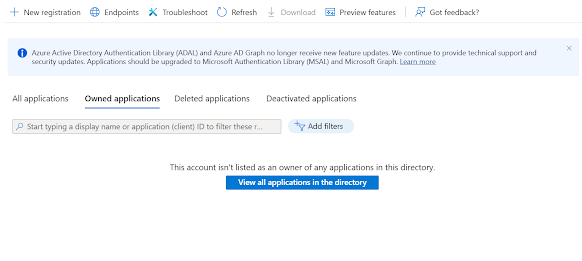
- Click on the New Registration button.
- Provide the necessary details:
- Name – A unique name for your application.
- Supported account types – Choose based on your requirement:
- Single tenant only – Use this if your application is meant for users within your organization only.
- Multi Entra ID tenant – Choose this to allow users from other organizations (e.g., partners) to log in using their credentials.
- Any Entra ID Tenant + Personal Microsoft accounts – Select this to support both organizational users and personal Microsoft accounts.
- Personal accounts only – Choose this if the application is intended solely for individual users with personal Microsoft accounts.
- Redirect URI – Under Redirect URI, select Web and enter
https://auth.sitecorecloud.io/login/callbackin the URL text box. The redirect URI is the endpoint to which the user is sent by the authorization server after completing its interaction, and to which an access token or authorization code is sent upon successful authorization.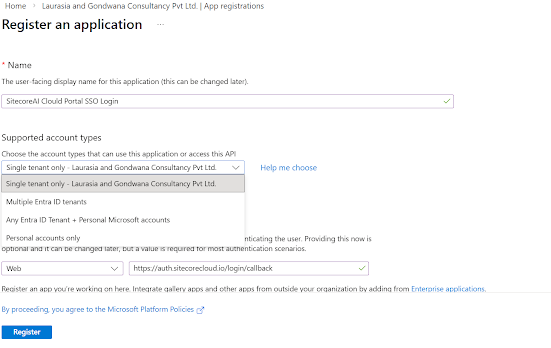
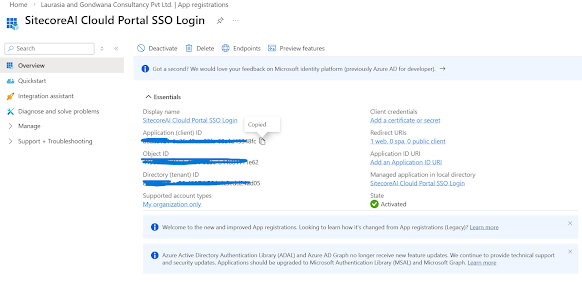
- Copy the Application (Client) ID from the newly created app page — you will need it when creating the SSO connection in Sitecore XM Cloud.
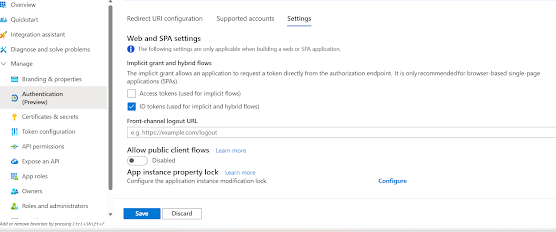
- Go to the Authentication tab → Settings and check the ID tokens checkbox.
Configure SSO in Sitecore Cloud Portal
- Log in to Sitecore Cloud Portal.
- Navigate to the SSO Settings:
- Click on Admin from the top menu.
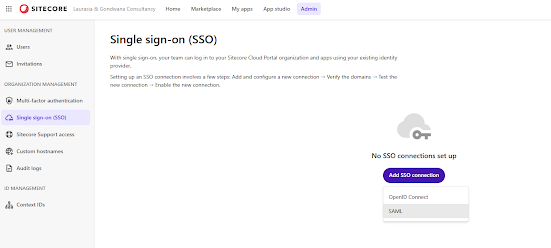
- Click Single Sign-On (SSO) from the left navigation, then click Add SSO connection.
- In the drop-down menu, select OpenID Connect.
- In the Add SSO connection dialog, fill in the required details:
- Email Domain: Enter the email domain(s) associated with this SSO connection (e.g.,
lng-consultancy.com). You can add up to 50 email domains for a single connection. Only team members with email addresses matching the domains specified here will be able to log in via SSO. Make sure the domains you add are valid and owned by your organization. - Connection Type: Choose either Front Channel or Back Channel based on your identity provider’s documentation.
- Discovery URL: Enter the discovery document URL for your Azure Entra ID tenant. Use the Tenant ID copied during the Azure setup. For example:
https://login.microsoftonline.com/{yourTenantID}/v2.0/.well-known/openid-configuration - Scopes: Include
openid,profile, andemail. Optionally, add scopes for claims likename,given_name,family_name, andnickname. - Client ID: Use the Client ID copied during the Azure Entra ID setup.
- Client Secret: If using Back Channel (Authorization Code flow), enter the client secret generated in Azure Entra ID.
- Callback URL: This is the redirect URI provided during app registration (
https://auth.sitecorecloud.io/login/callback).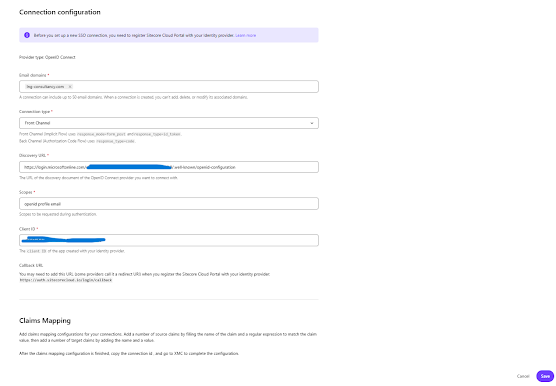
- Email Domain: Enter the email domain(s) associated with this SSO connection (e.g.,
- Verifying Your Domain : After saving, a TXT record will be generated. Copy the TXT record and add it to your domain’s DNS records. Without domain verification, users will not be able to log in using SSO.
Example: If your organization ownslng-consultancy.comandlngconsultancy.co.in, you can add both domains in the Email Domain field to allow employees with either domain to log in using their Azure AD credentials.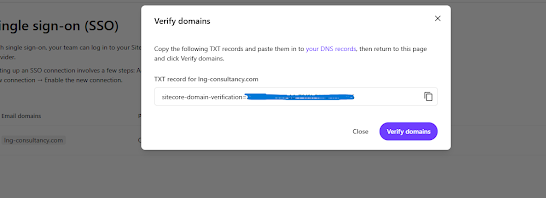
Enabling the SSO Connection
After verifying the domain and optionally testing your SSO connection, you can enable it.
- Navigate to the Sitecore Cloud Portal SSO page.
- Locate the SSO connection you want to enable and click Enable.
- Once enabled, team members with email addresses matching the SSO connection domain can log in using their identity provider.
I hope this helps you set up SSO in the Sitecore Cloud Portal (XM Cloud). Feel free to drop a comment if you have any questions!